Events Management
This guide walks you through the full Event management flow in the Palabra user interface. It covers how to create an Event, create and configure Channels, start and stop streaming at both Event and Channel level, share and use the Listener Page, and update Channel settings for routing, translation, audio, and advanced options.
How to create an Event
- Open Events.
- Click Create Event.
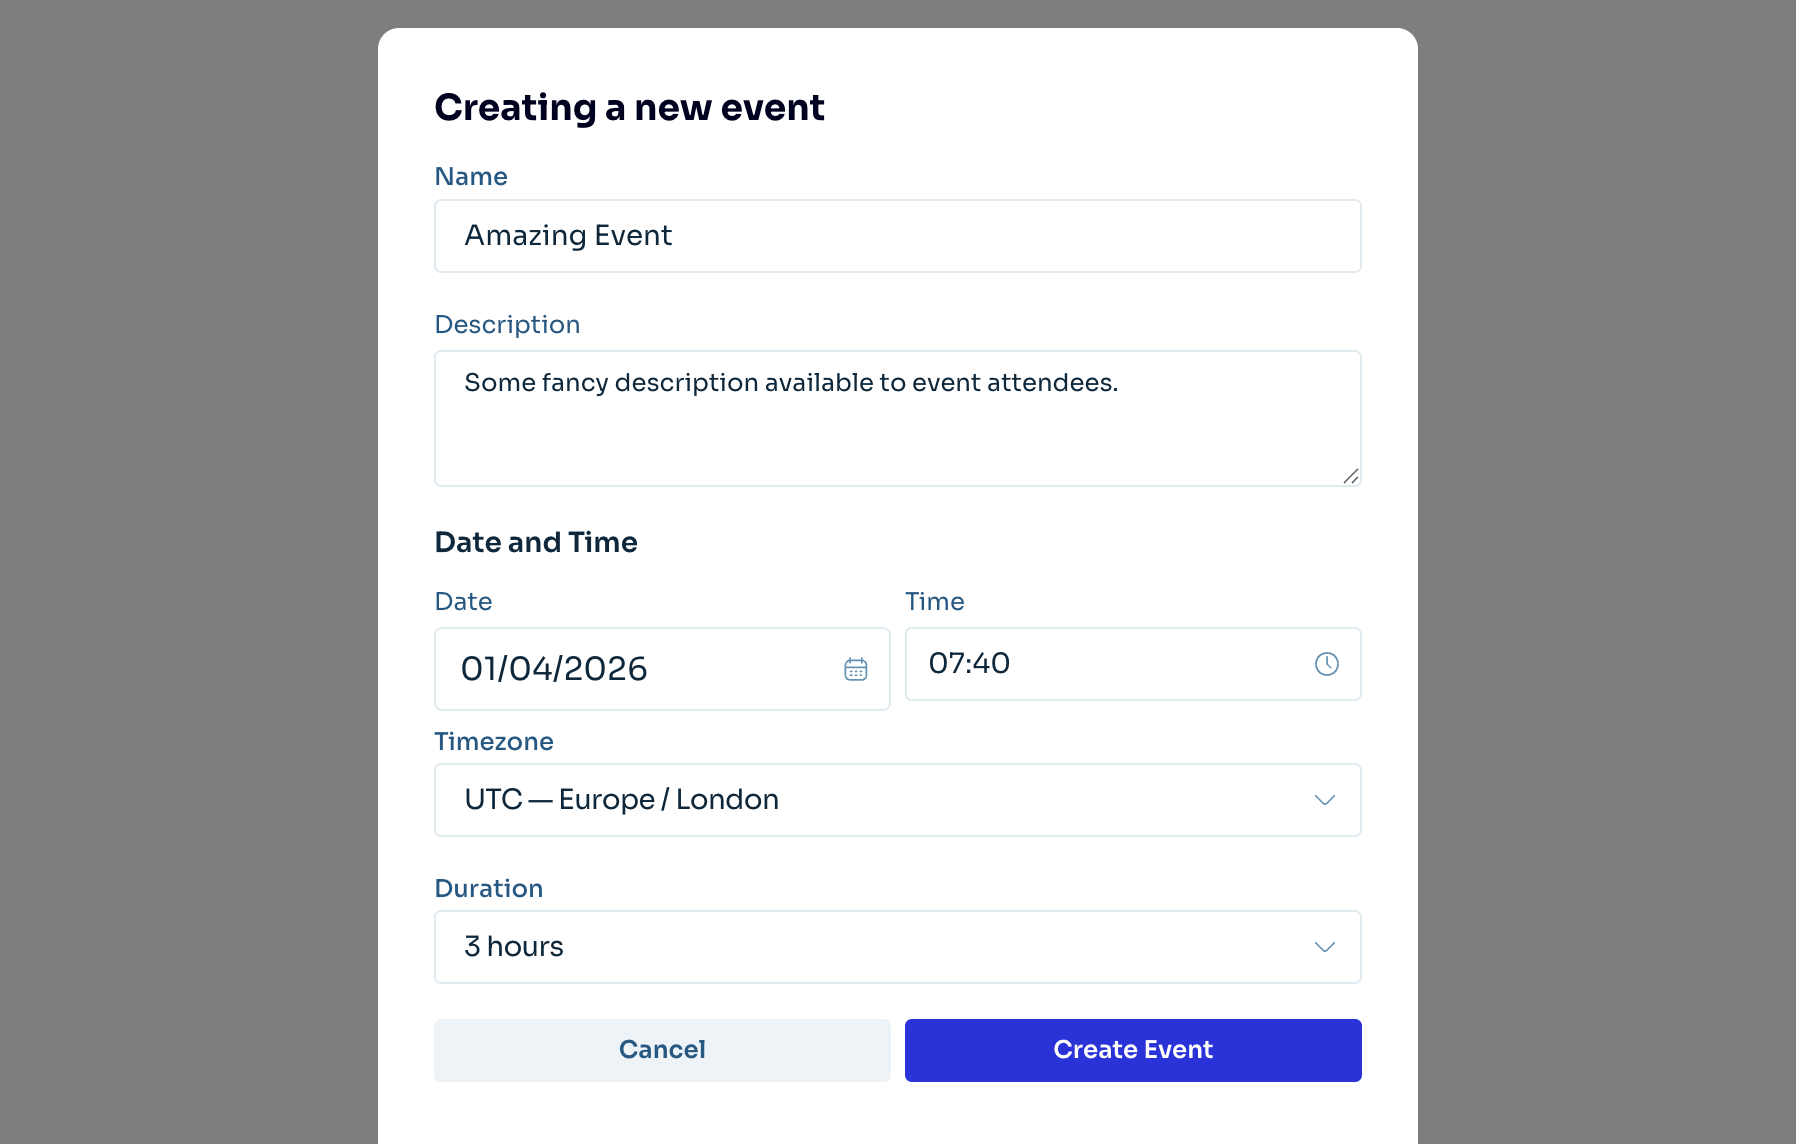
- Fill in general event information (shown to attendees on the Listener Page):
- Name - custom event title
- Description - custom event description
- Date - event start date
- Time - event start time
- Timezone - timezone for the selected date and time
- Duration - event duration in hours
- Click Create Event to submit the form.

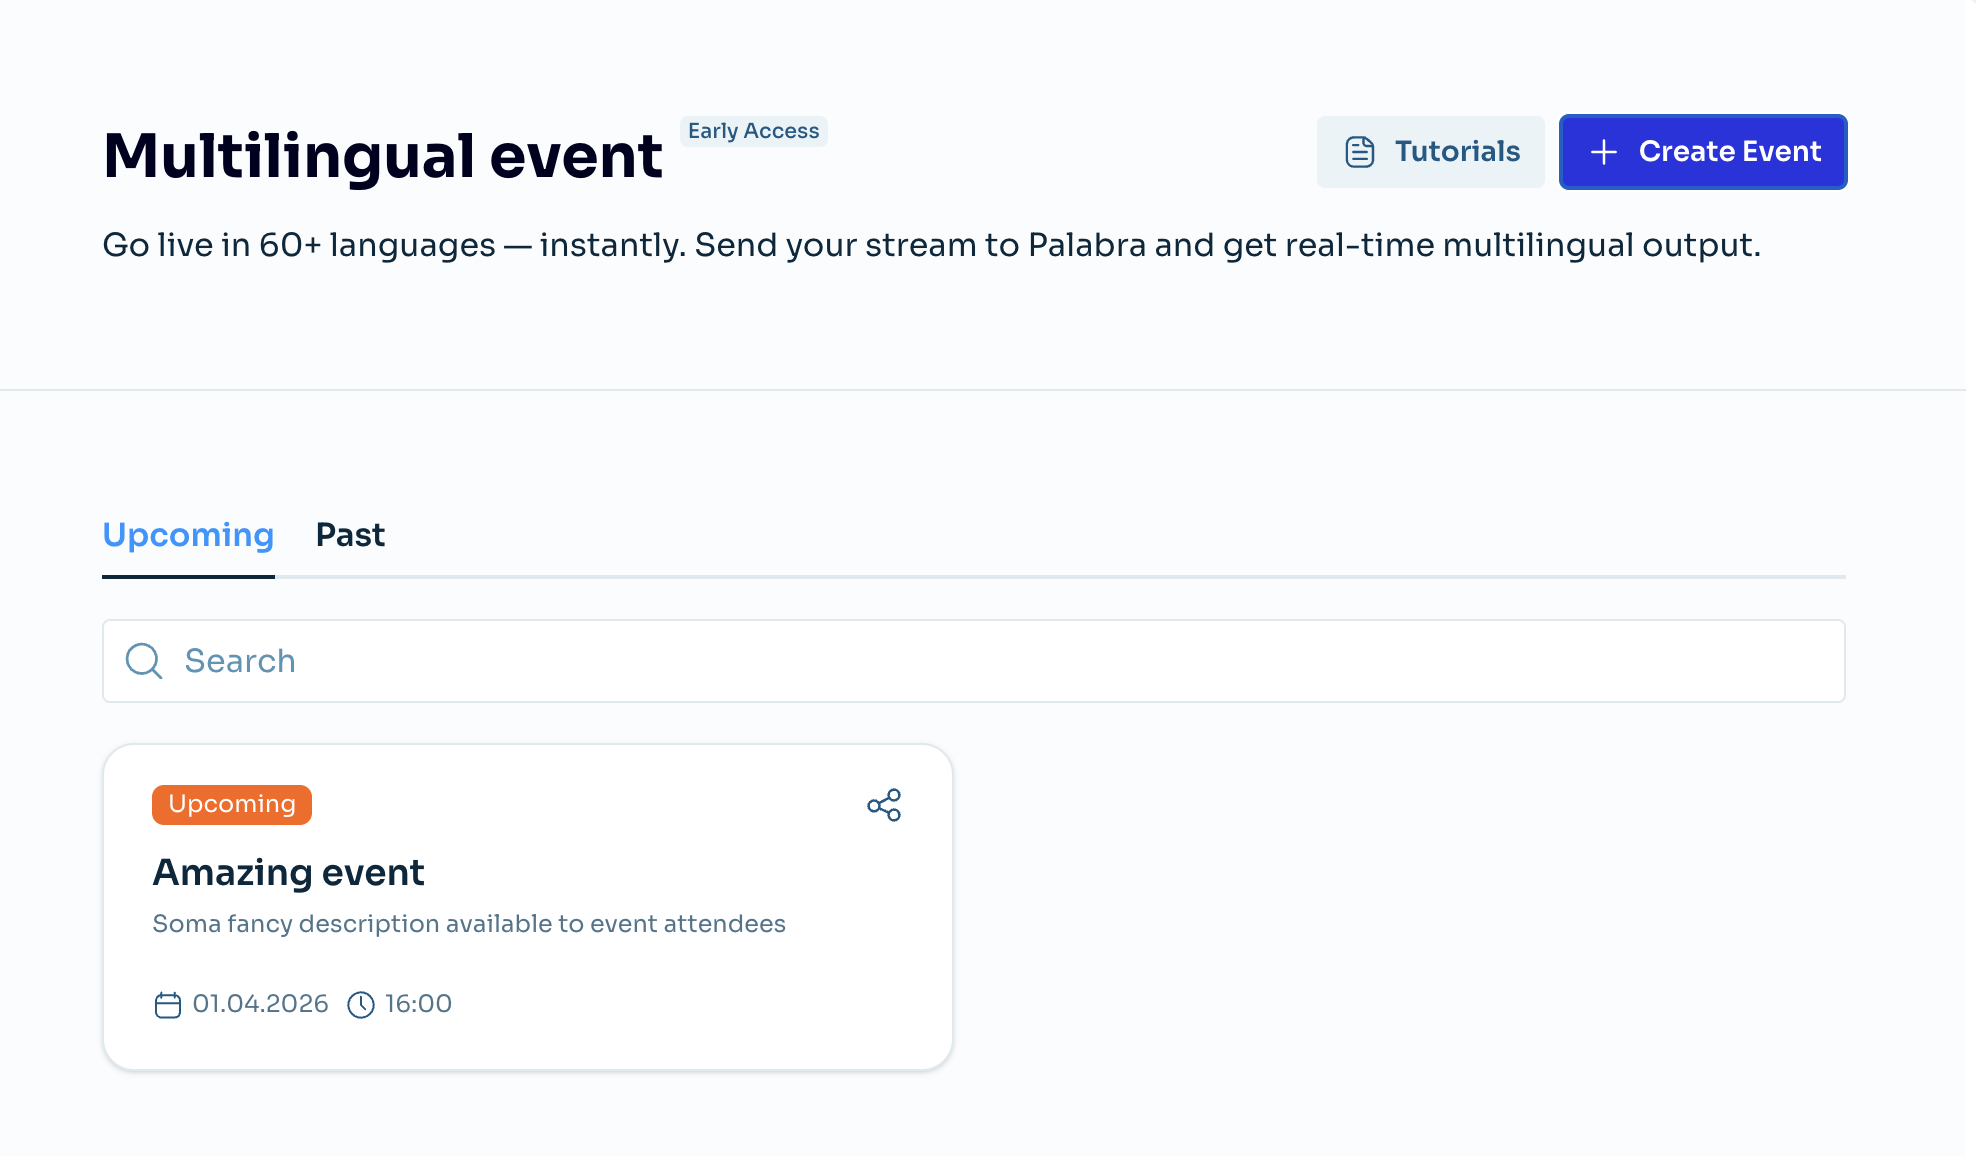
After creation, the Event appears in the Events list as a card, ready to open.
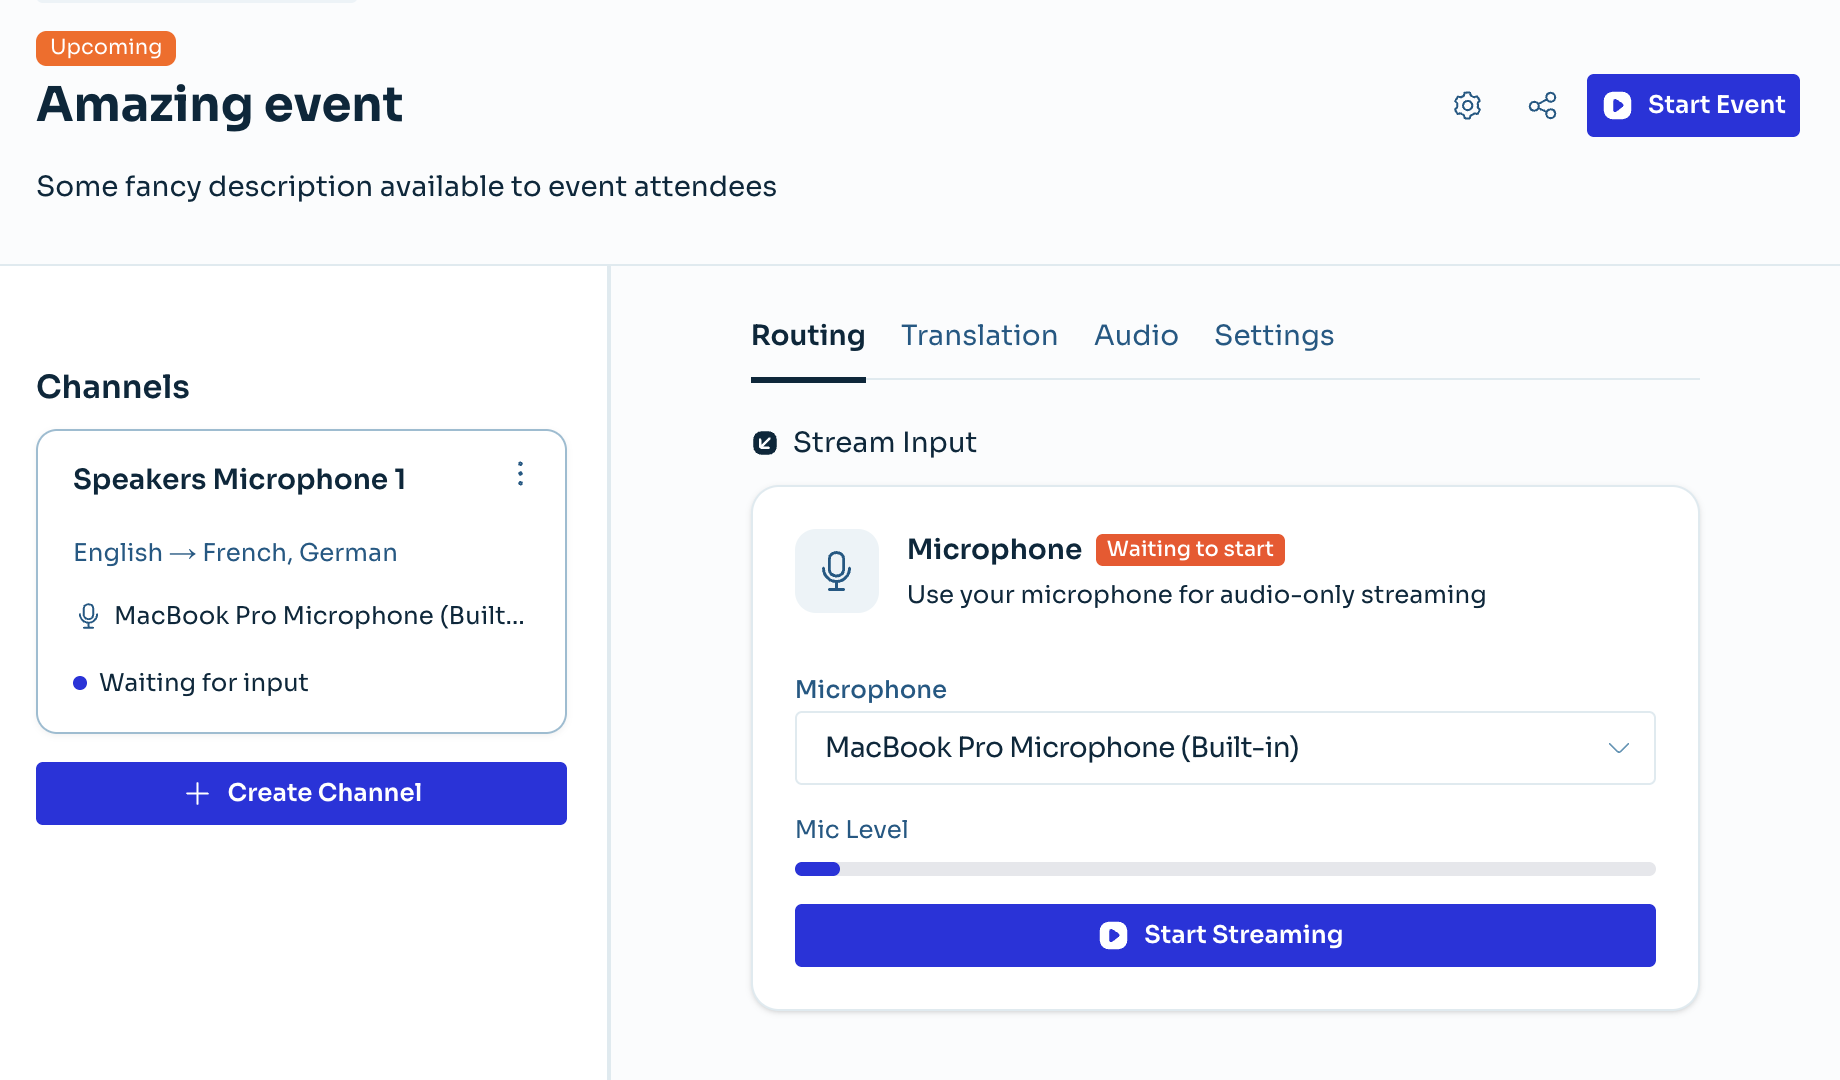
How to create an Event Channel
A Channel is a scoped set of configurations for a specific audio device. When you create a Channel, you attach a specific audio device (microphone) to the Event, define the language spoken by that microphone's owner, and specify which languages Palabra should translate the speech into.
Event Channel creation
- Open your Event card (from the Events page).
- In the channel sidebar, click Create Channel.
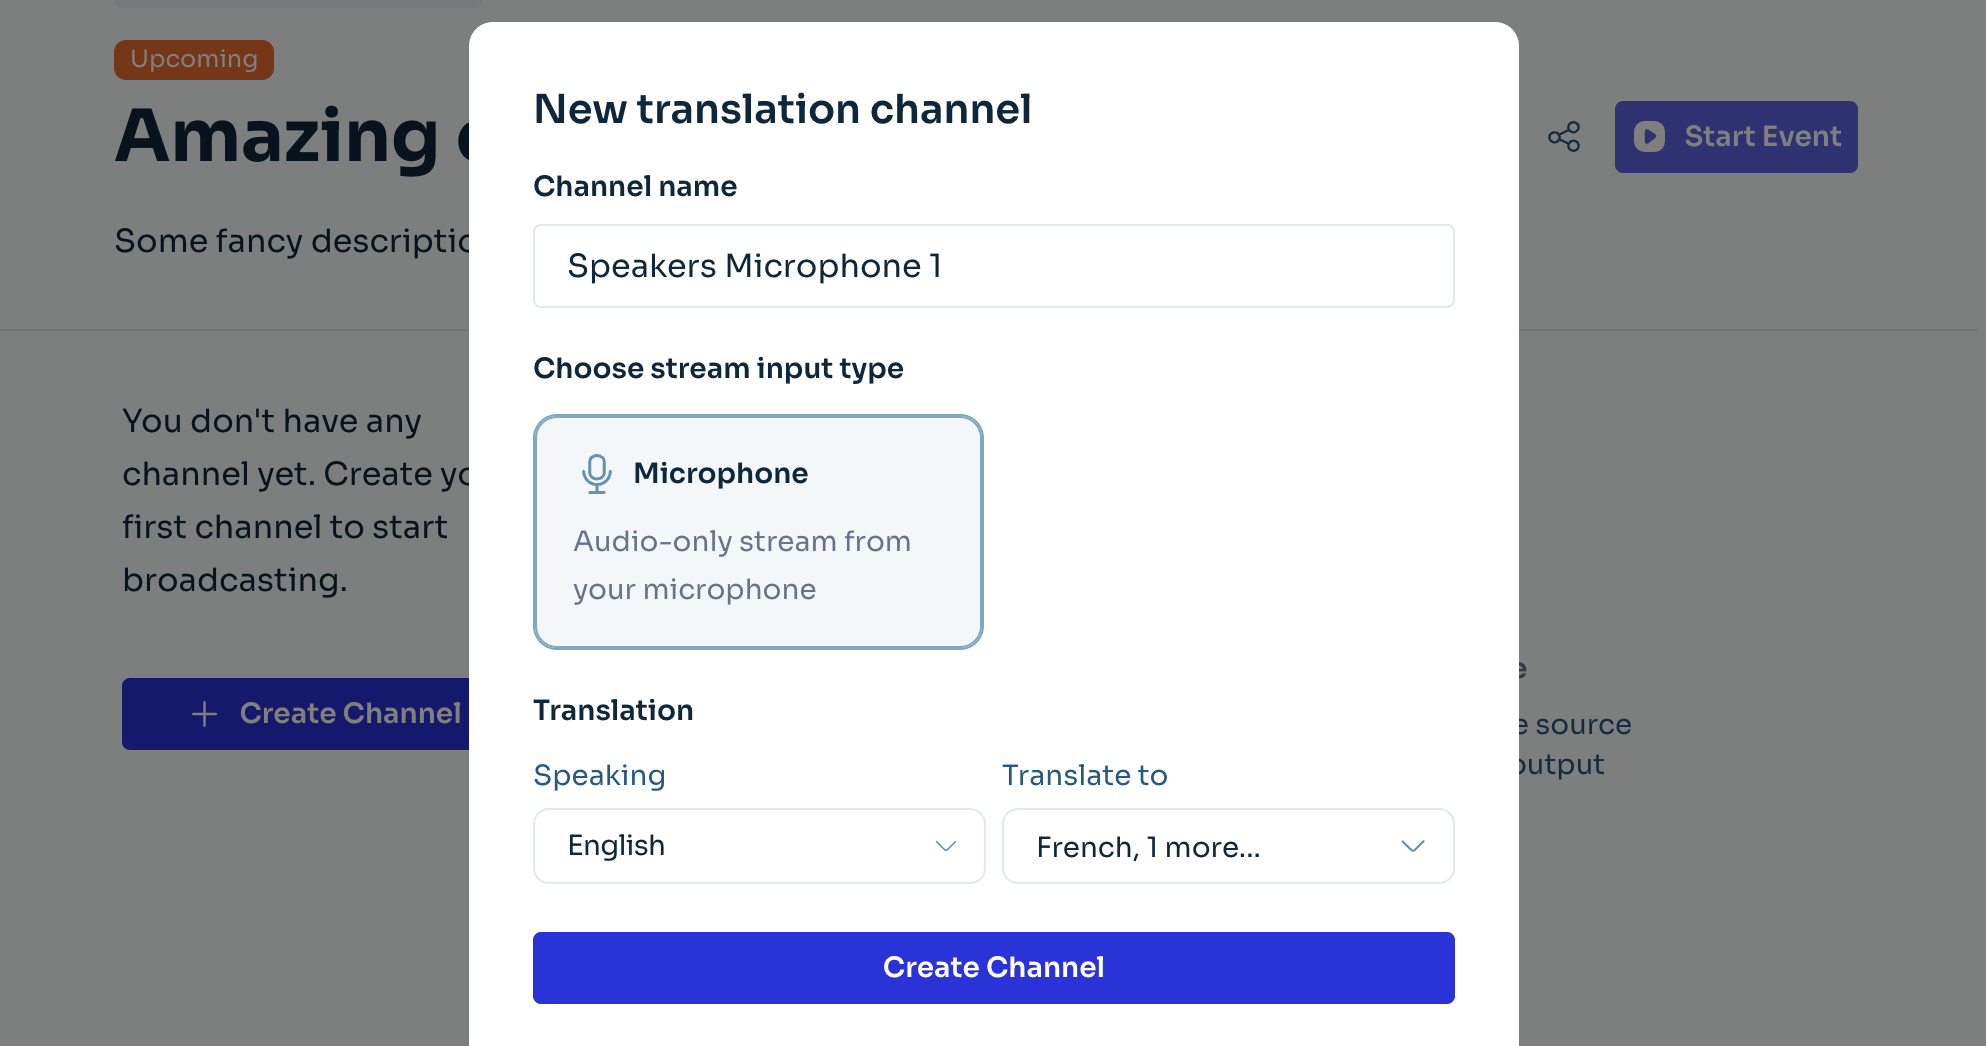
- In New translation channel, set:
- Channel name
- Stream input type (Microphone)
- Speaking (source language)
- Translate to (one or more target languages)
- Click Create Channel.

Notes:
- You must choose languages before creation. But you can change them anytime later.
- New channels open automatically after creation.
How many Channels do you need to create
You must create at least one Channel for each Event. Whether you need more depends on your Event setup. For practical scenarios, see Event Channel setup examples.
How to start and stop an Event
Start/stop all Channels in an Event
- Open the event page.
- Click Start Event in the header to start all eligible channels.
- Click Stop Event to stop all running channels for that event.
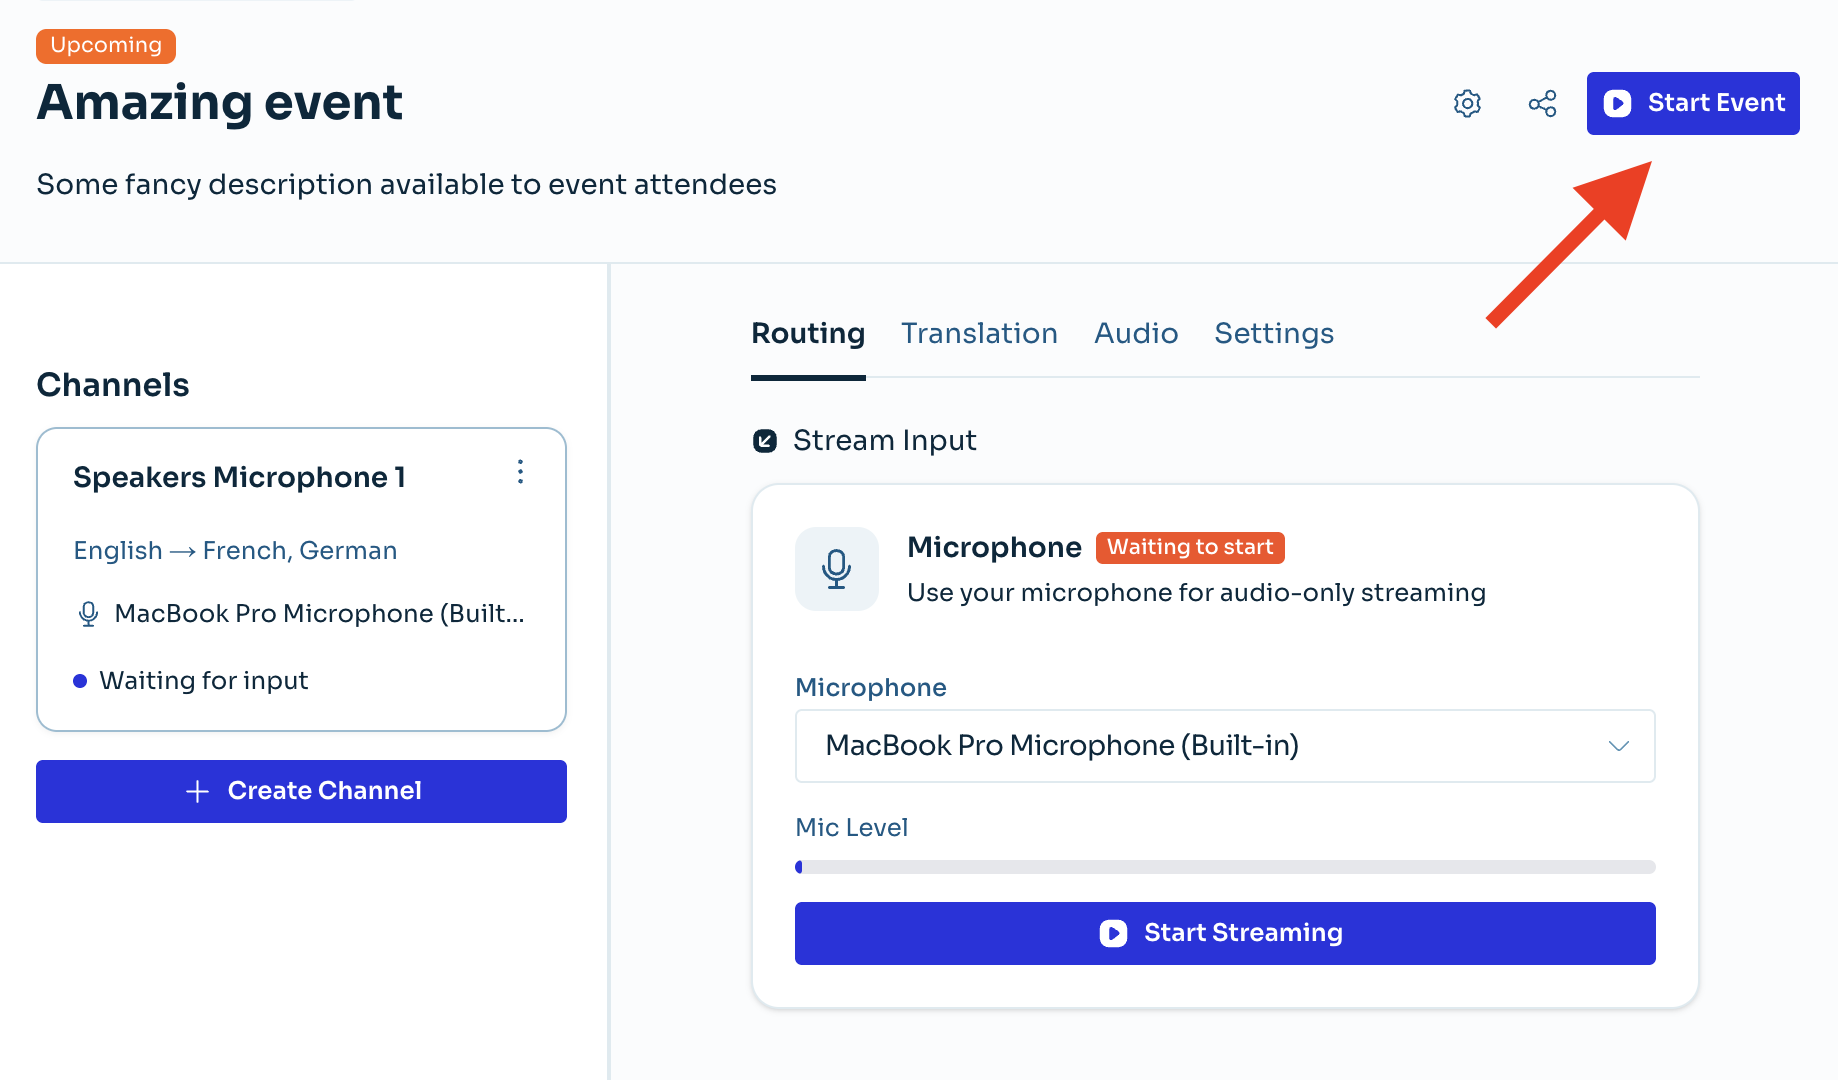
When you start the Event, all created Channels start streaming. If you have more than one Channel, they all start in parallel.
Note: Start Event is disabled when there are no Channels. You must create at least one Channel.
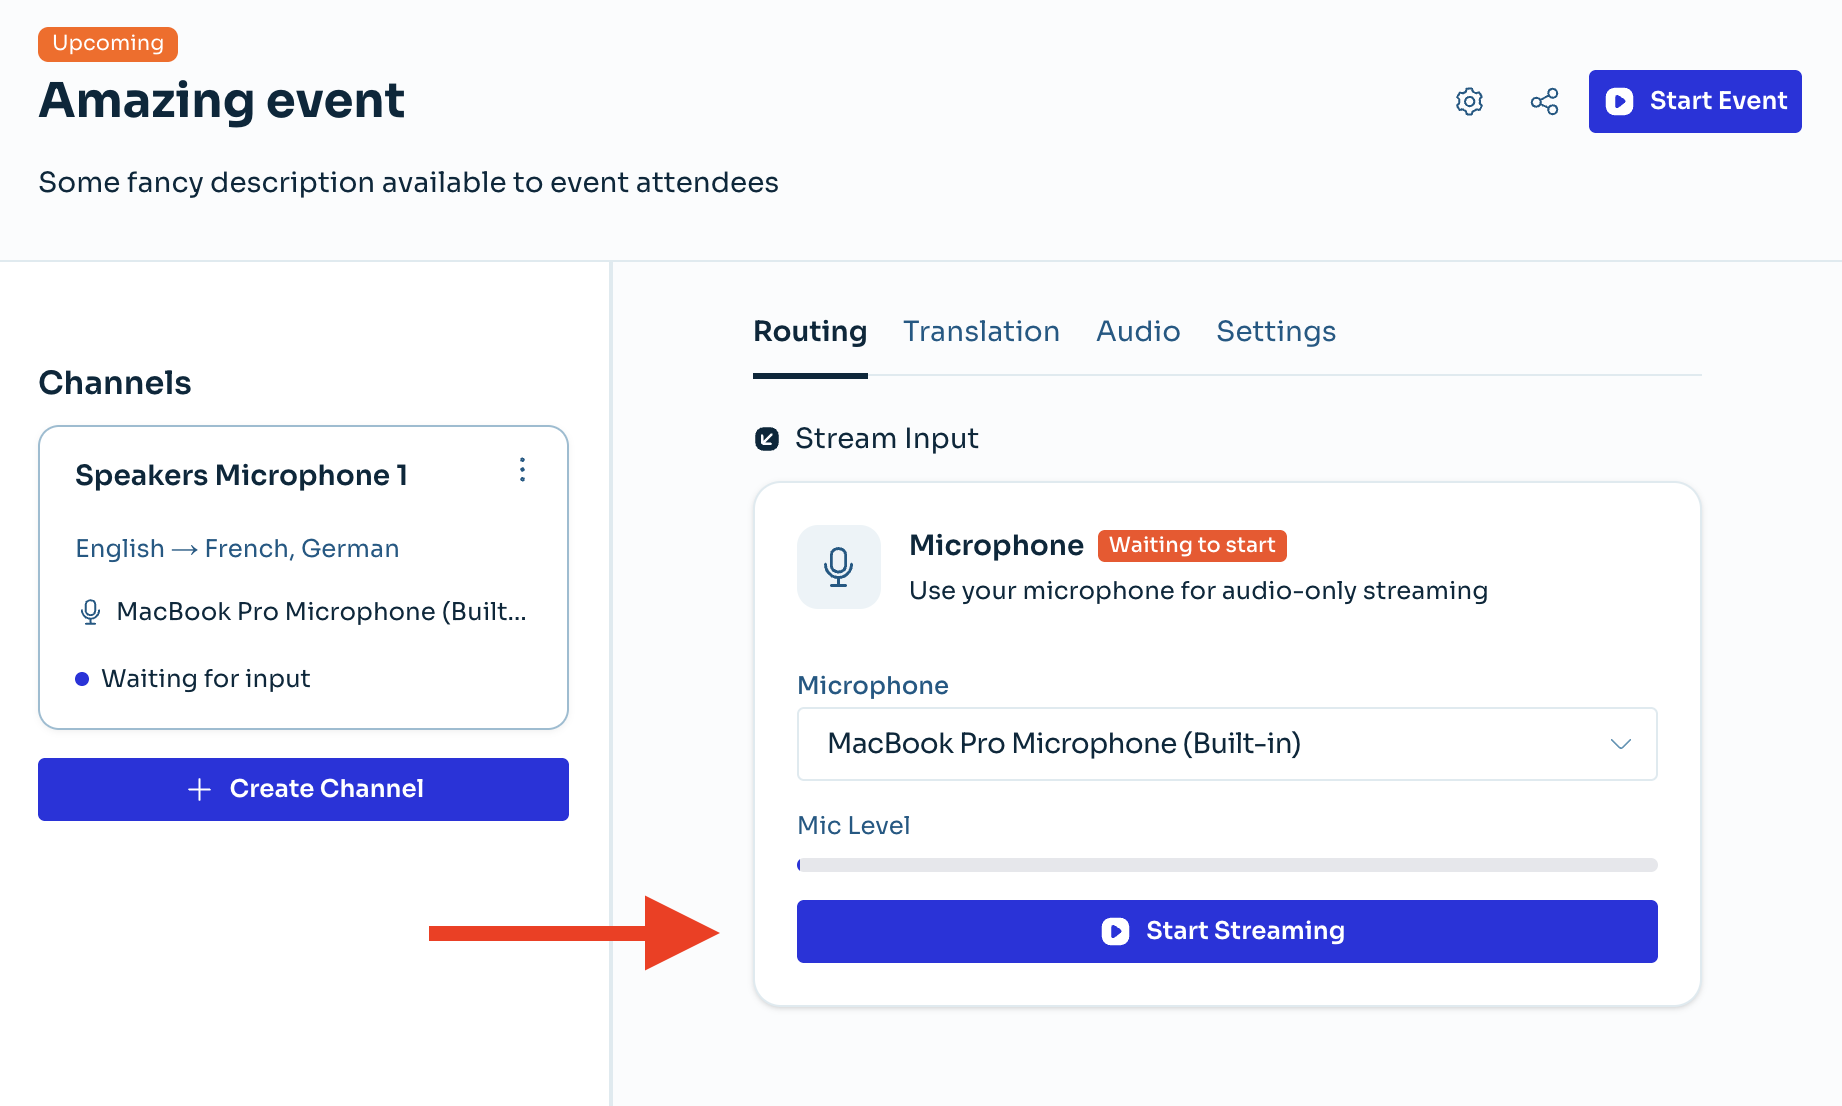
Start/stop per Channel
If you prefer, you can start each Channel individually. This can reduce billing if you start only the Channels needed at that moment.
- Open the channel.
- Go to the Routing tab (the default tab).
- Select a microphone device in the Microphone dropdown.
- Click Start Streaming (or Stop Streaming).
How to use the Listener Page
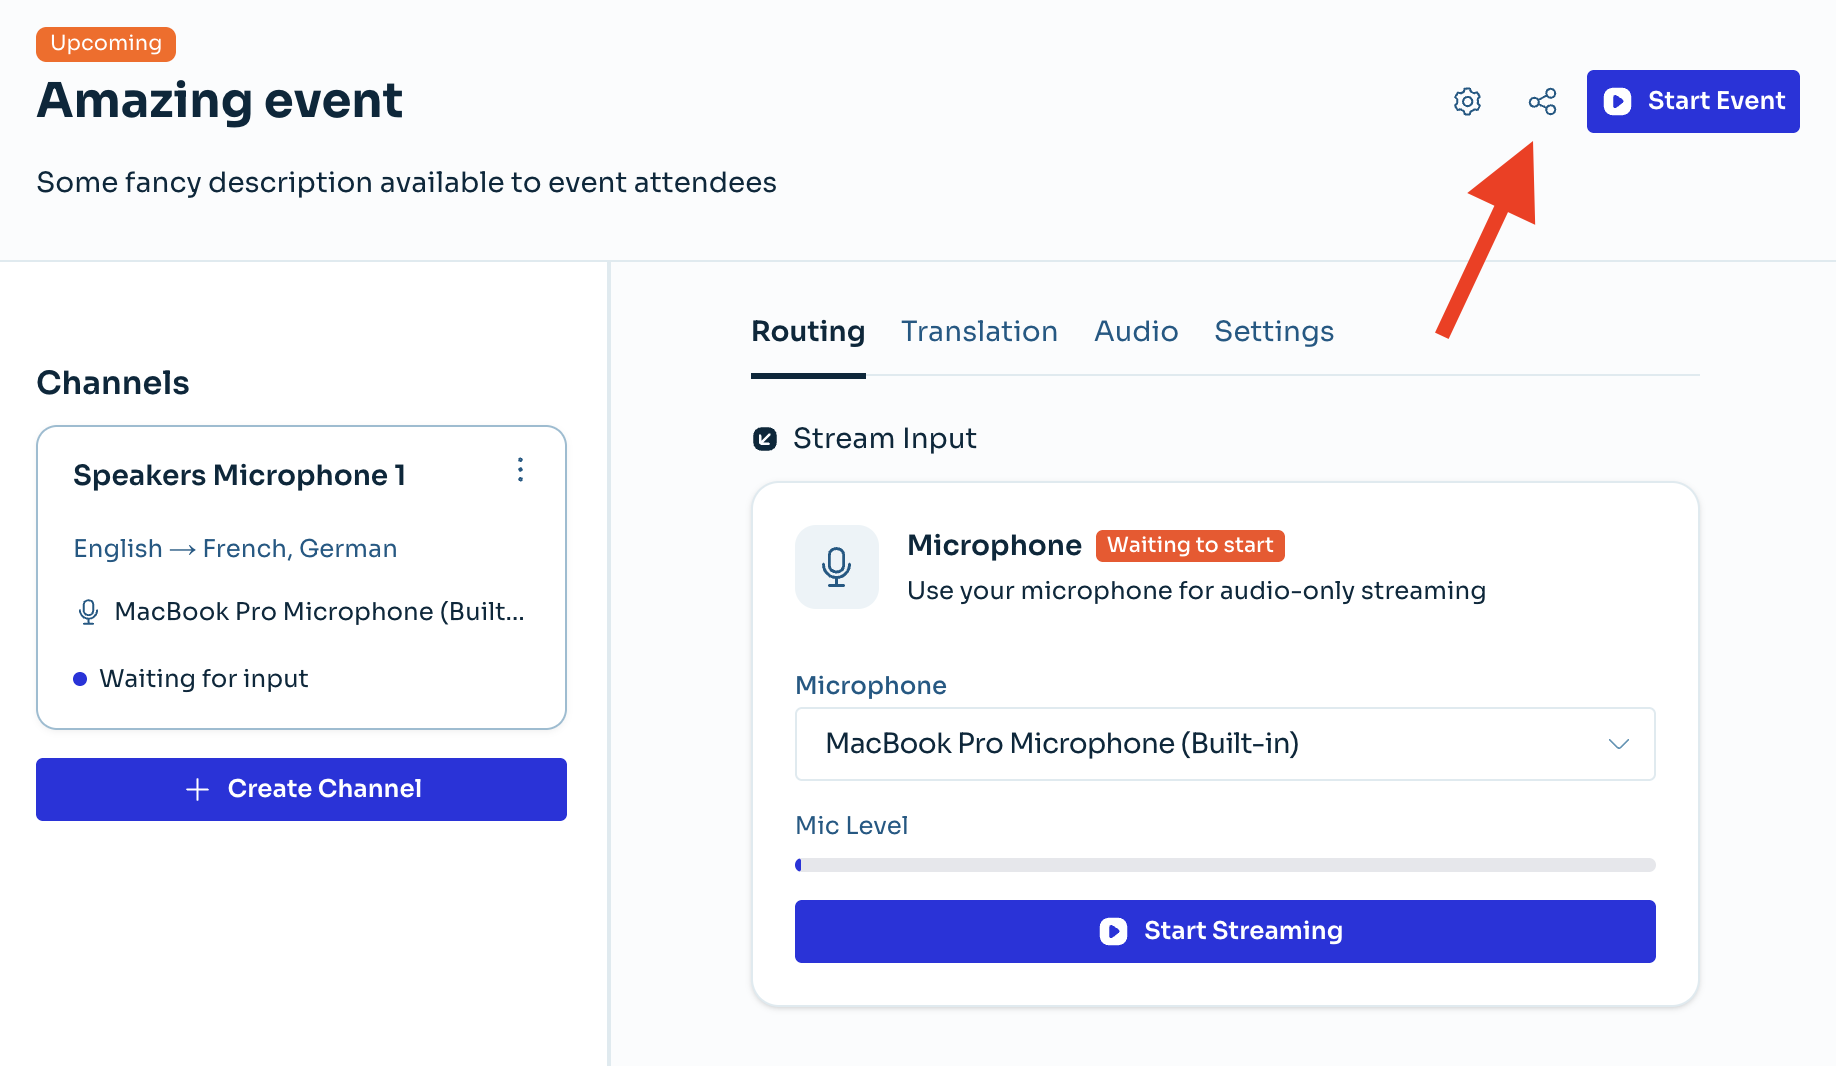
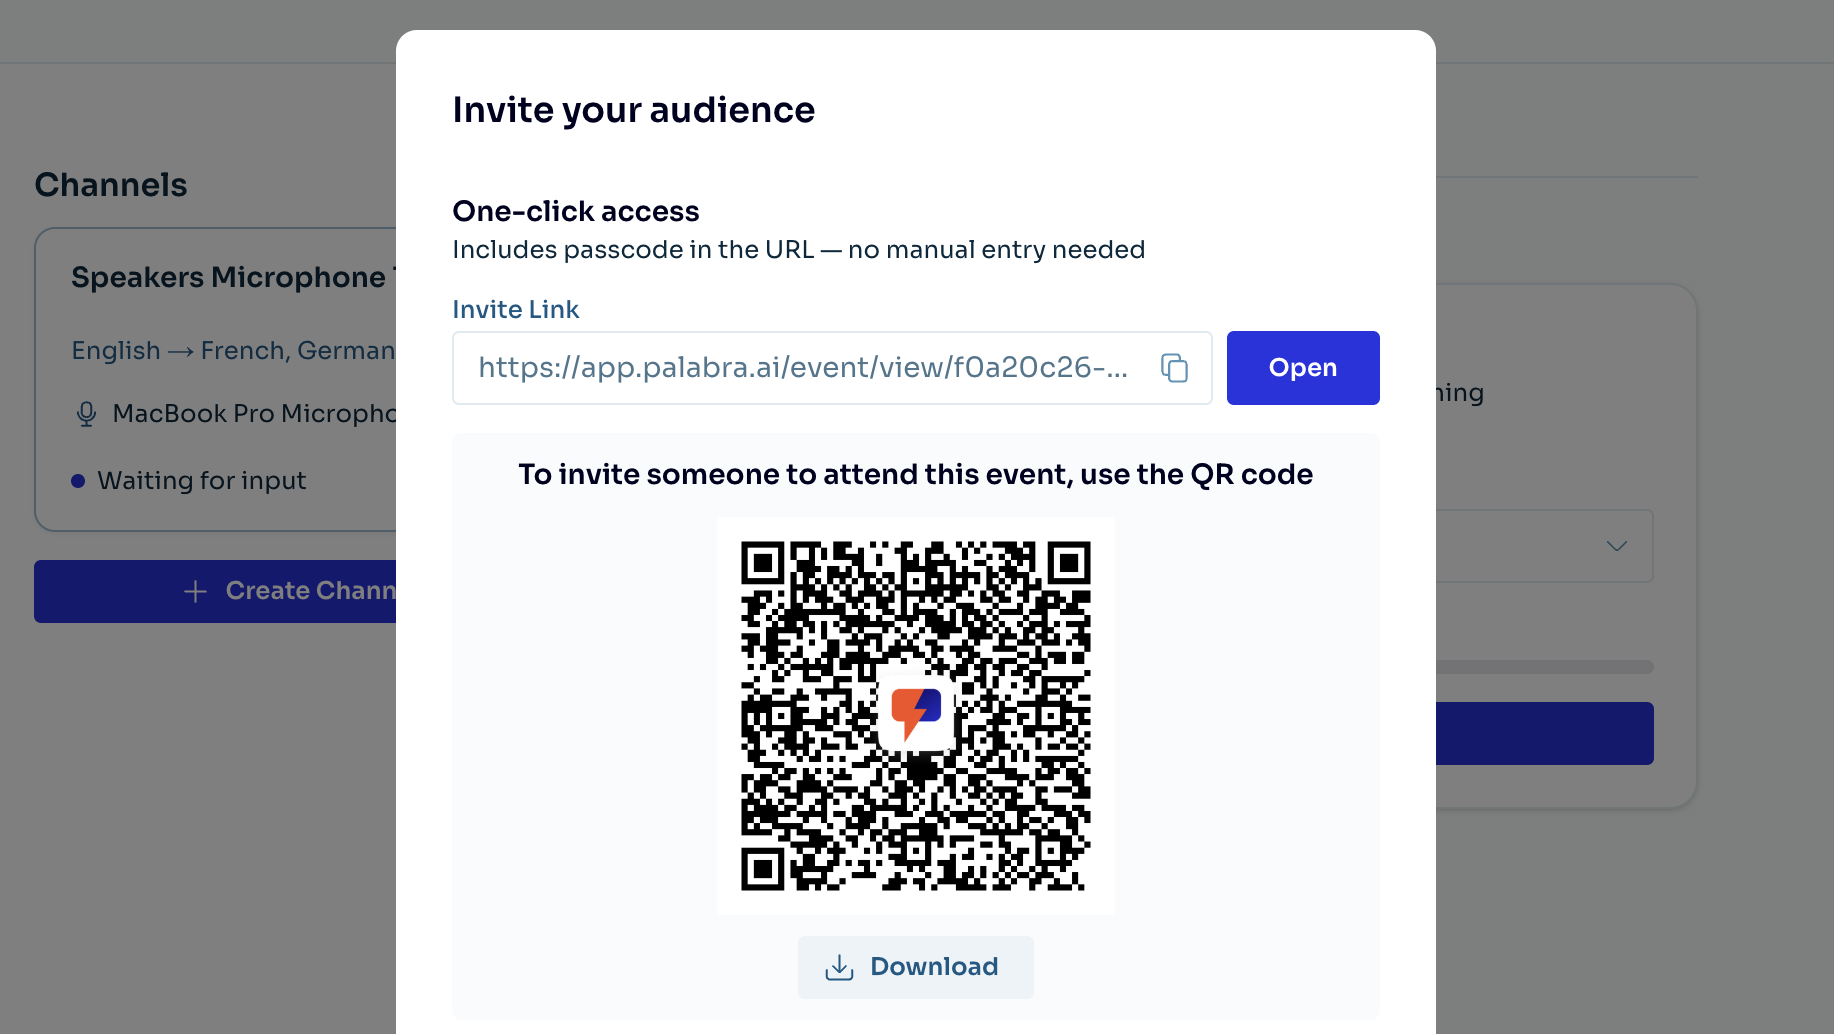
Share the Listener Page link and QR code
- Click the Share button on the Event card or in the header of the Event page.
- In the Invite your audience pop-up:
- Copy/open Invite Link
- Download the event QR code (optional)
Use the Listener Page
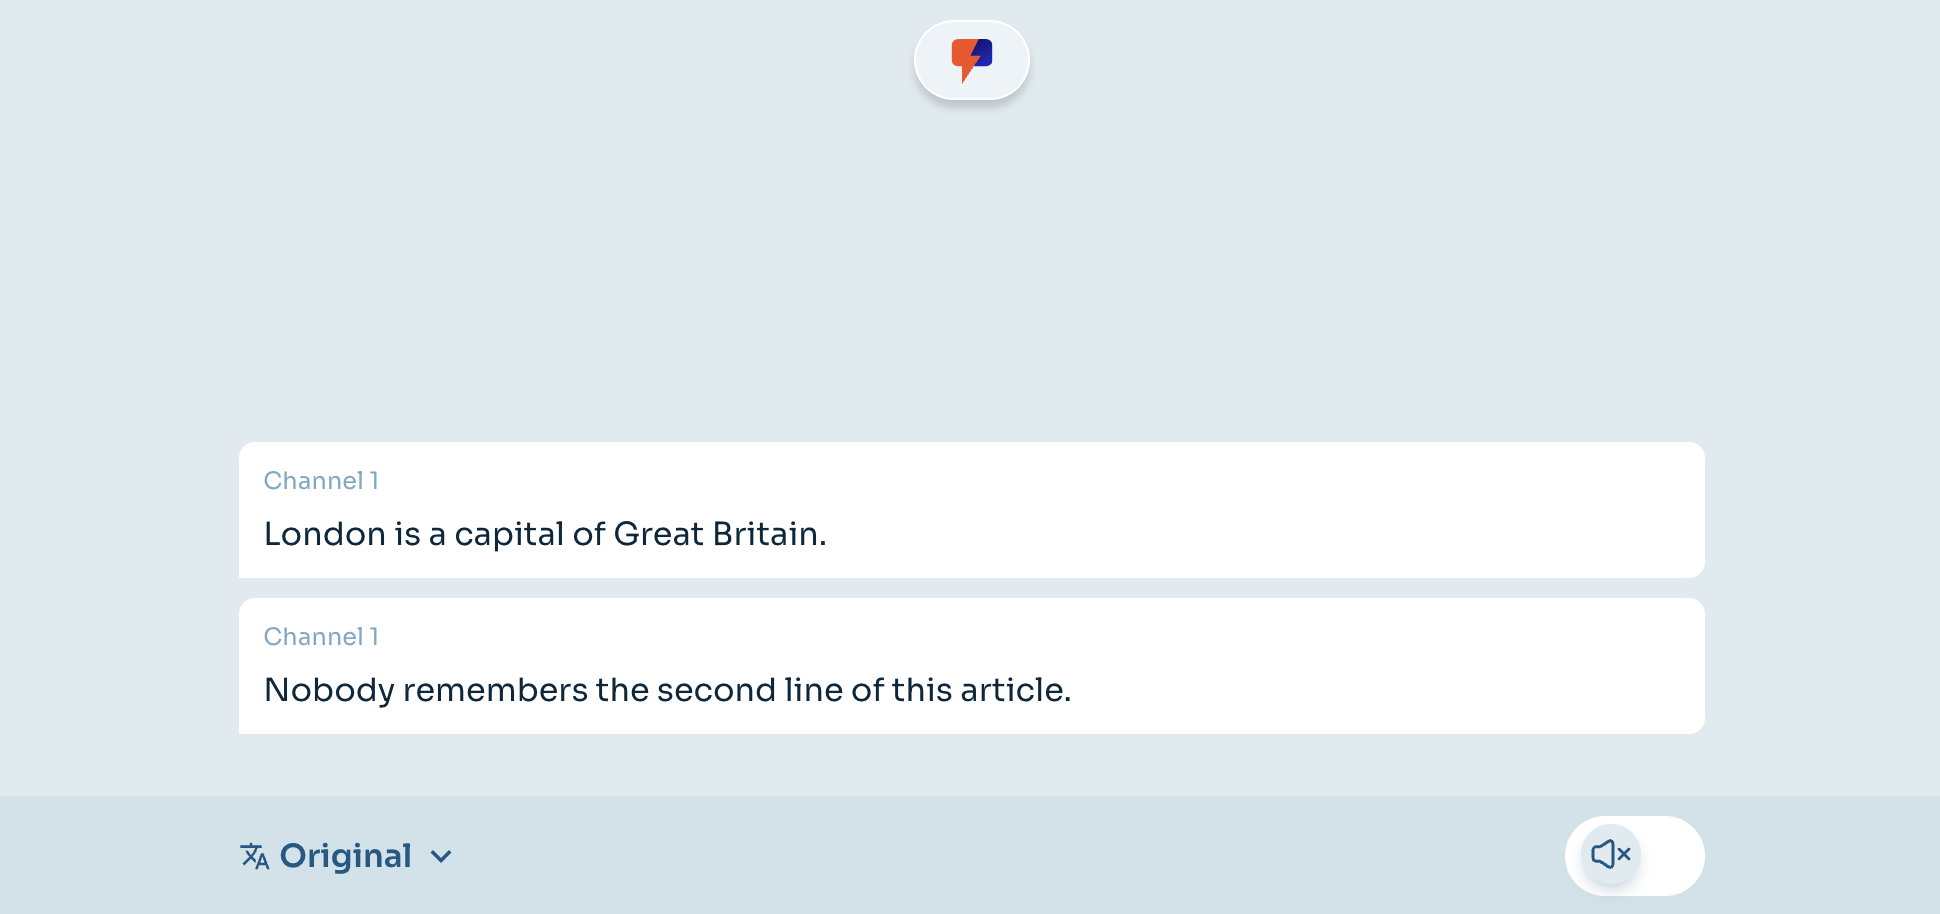
On the Listener Page:
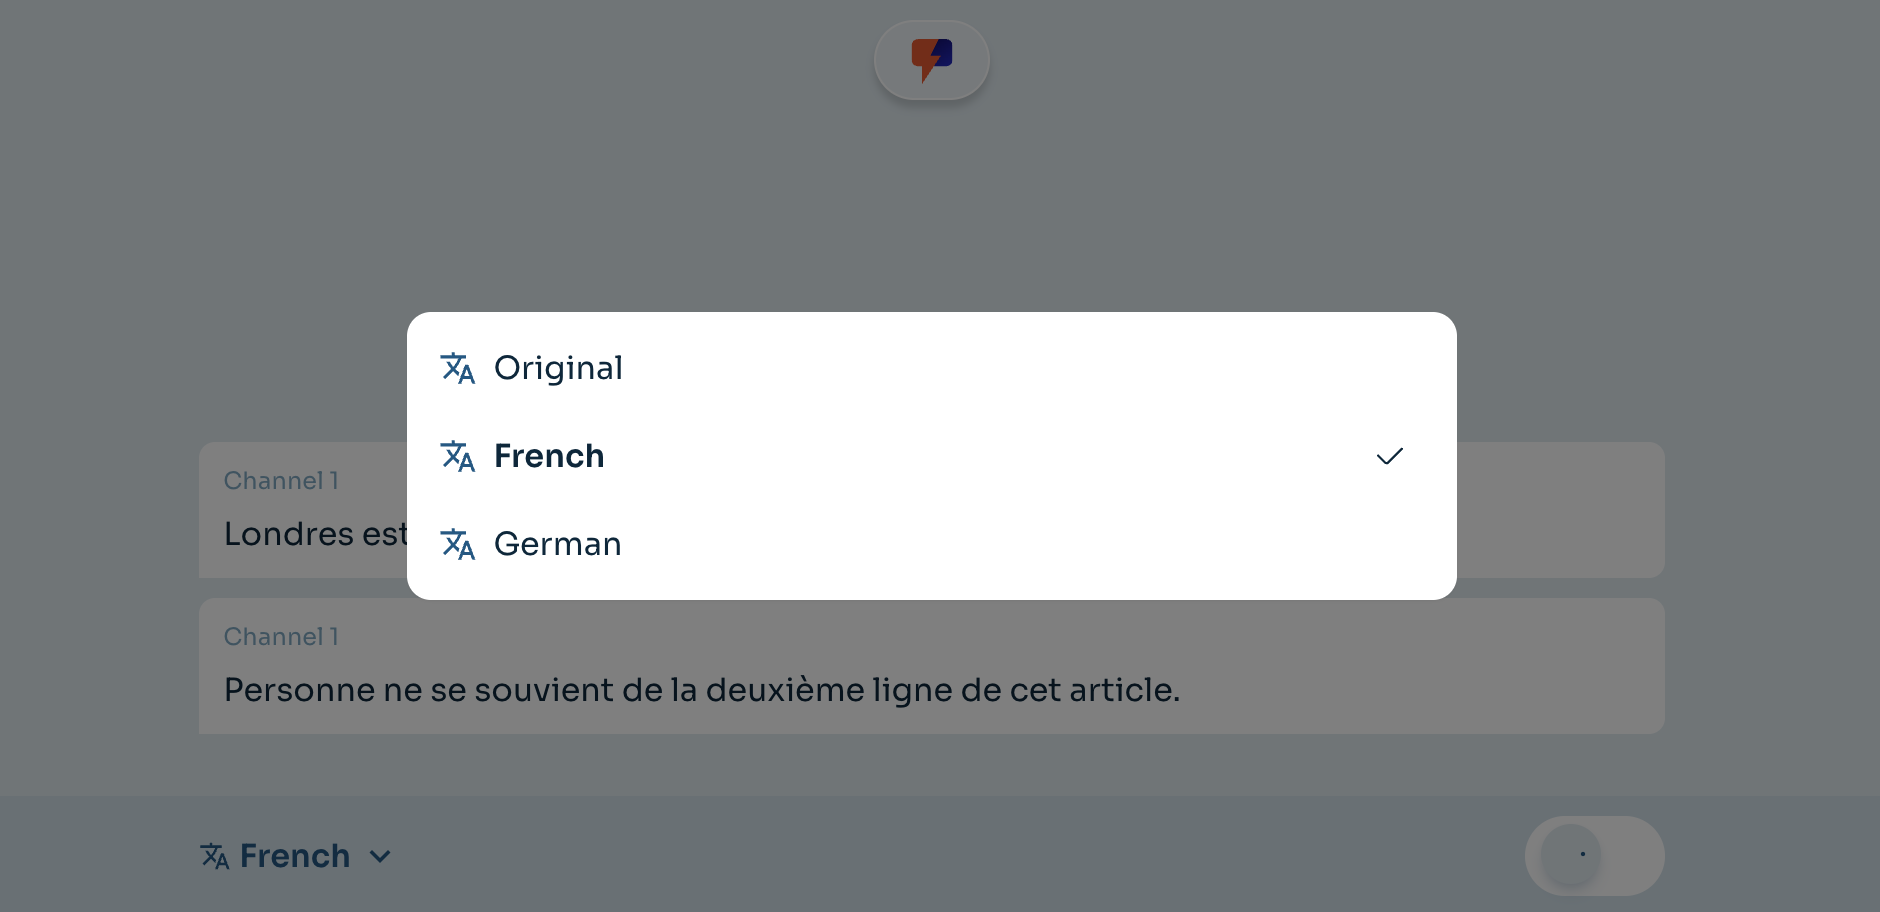
- Use the language picker in the bottom toolbar to select Original or a translation language.
- Use the audio switch to enable/disable translated audio playback.
- Read live captions in the center area.
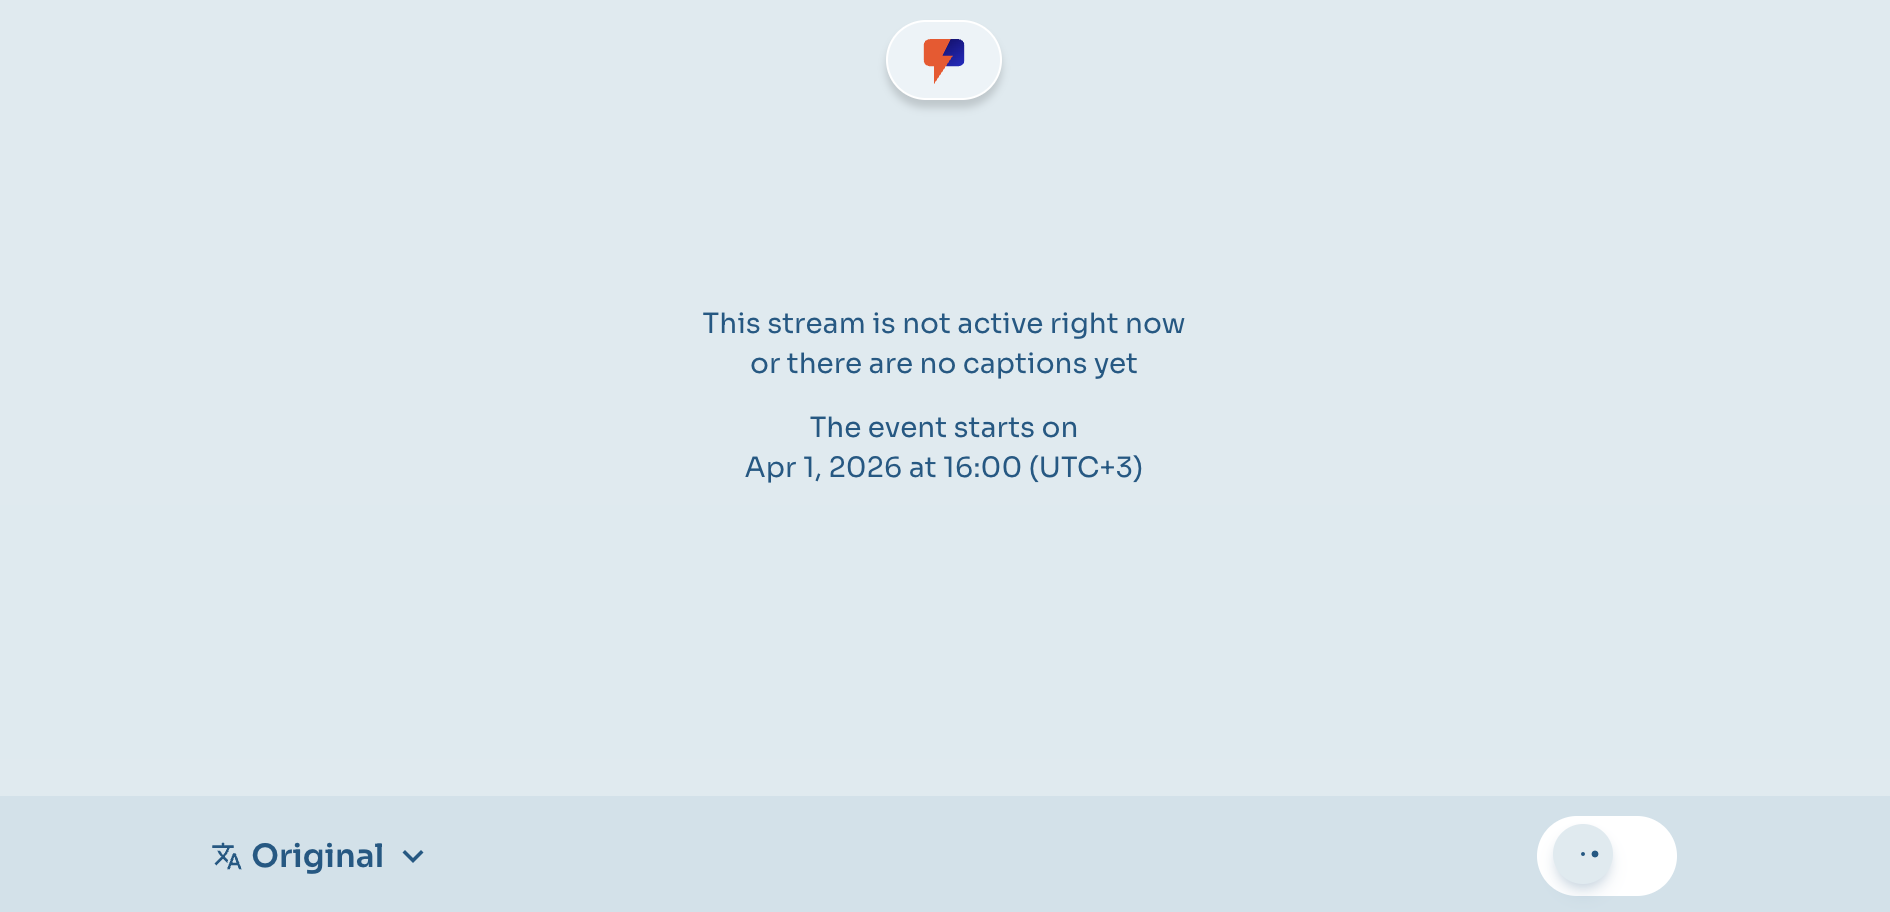
If there is no live stream yet, the page shows a “not active/no captions yet” message and event start time.
As soon as any Channel starts streaming original speech, the Listener Page starts showing text captions and real-time audio for the original speech and all configured target languages.

If multiple Channels run in parallel, captions and speech audio in the same language from all Channels are combined into one shared feed and audio output on the same Listener Page.
This means multiple Channels can be active at the same time if needed, but speakers across all Channels are intended to speak one by one (not in parallel).
Note: Channels are intended to organize speakers with different source languages and audio device setups for the same Event output. Channels are not intended for 2+ stages that process different topics in parallel. If you have 2+ stages that must run in parallel (each stage has a separate, independent speaker), create a separate Palabra Event for each stage to have a different Listener Page for each stage.
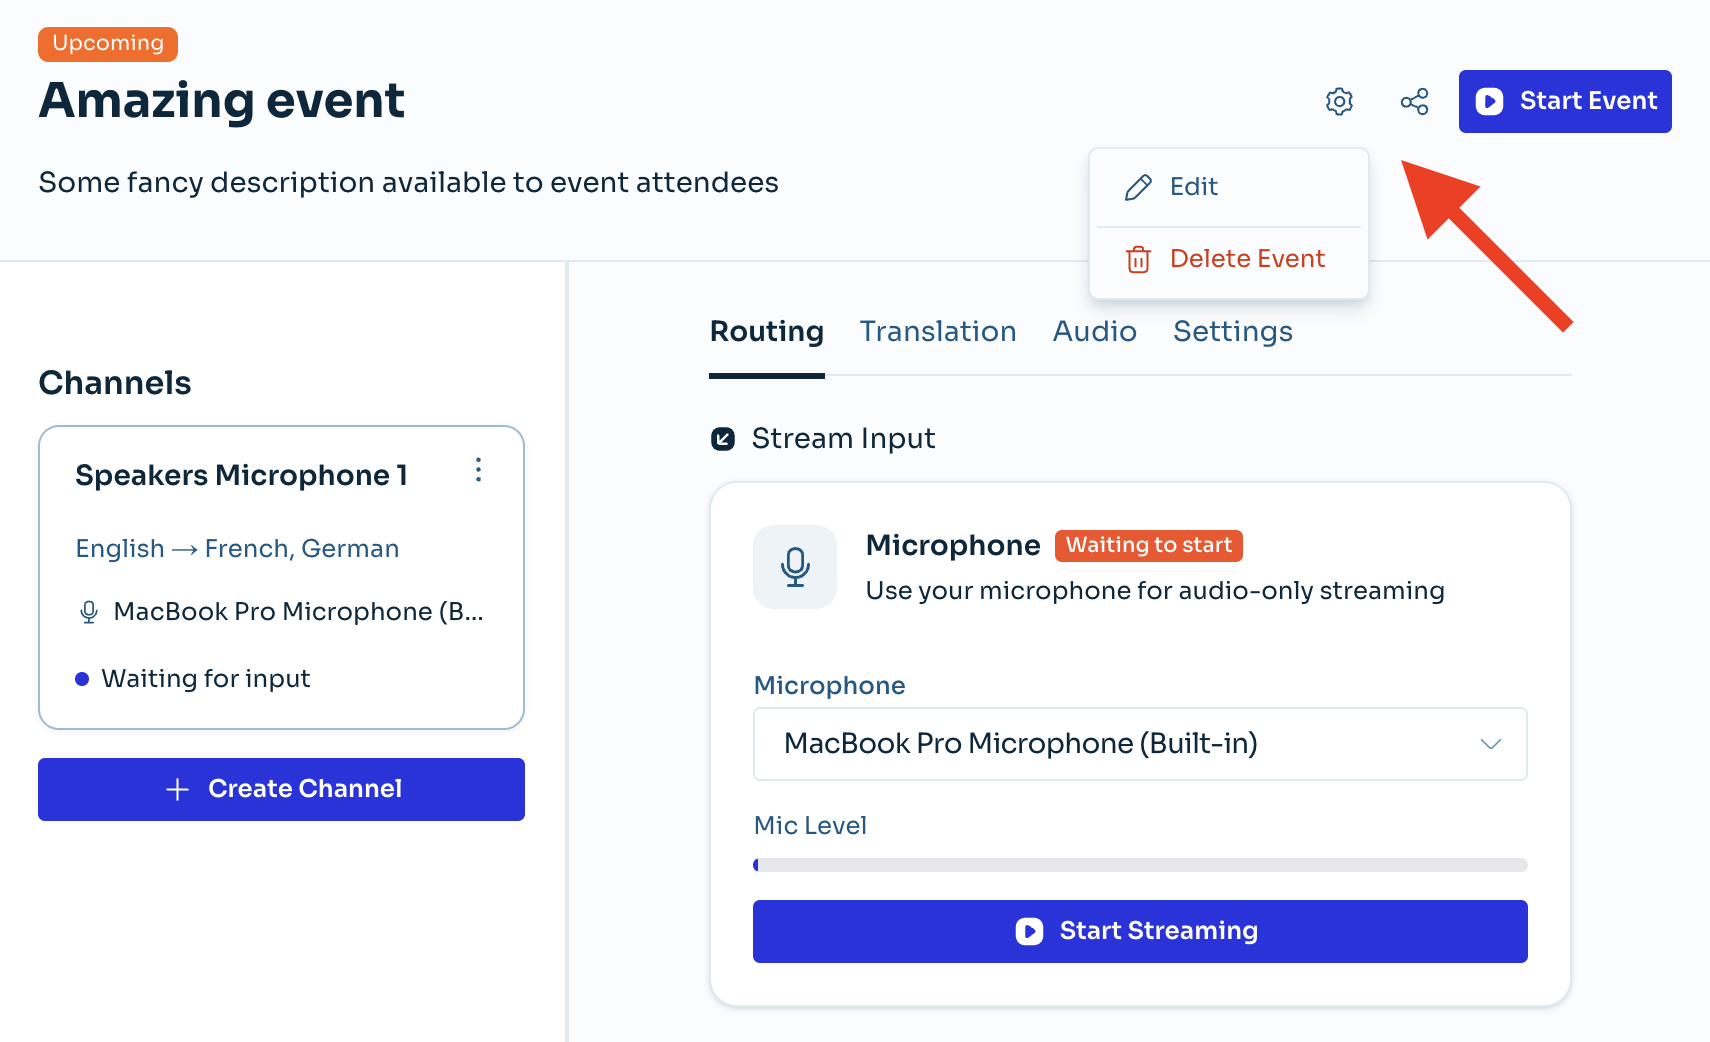
How to edit an Event
- Open the Events list.
- Click the Settings button (gear icon) in the header.
- Click Edit.
- Update fields in Editing event dialog.
- Click Apply Changes.
The Event edit form looks and works the same as the Event creation form, so you can edit the title, description, and other general event information.
How to edit an Event Channel
- Open the Events list.
- Open the Event and select the Channel from the sidebar.
- Edit settings in these tabs:
- Routing (input/microphone state)
- Translation (source/target languages)
- Audio (voice and audio behavior)
- Settings (channel name and description)
- When the bottom bar appears, click Apply Changes to save.
Notes:
- Cancel in the bottom bar reverts unsaved channel changes.
- Applying changes can restart the stream (UI warns about this).
- Advanced JSON options are available in the Settings tab.
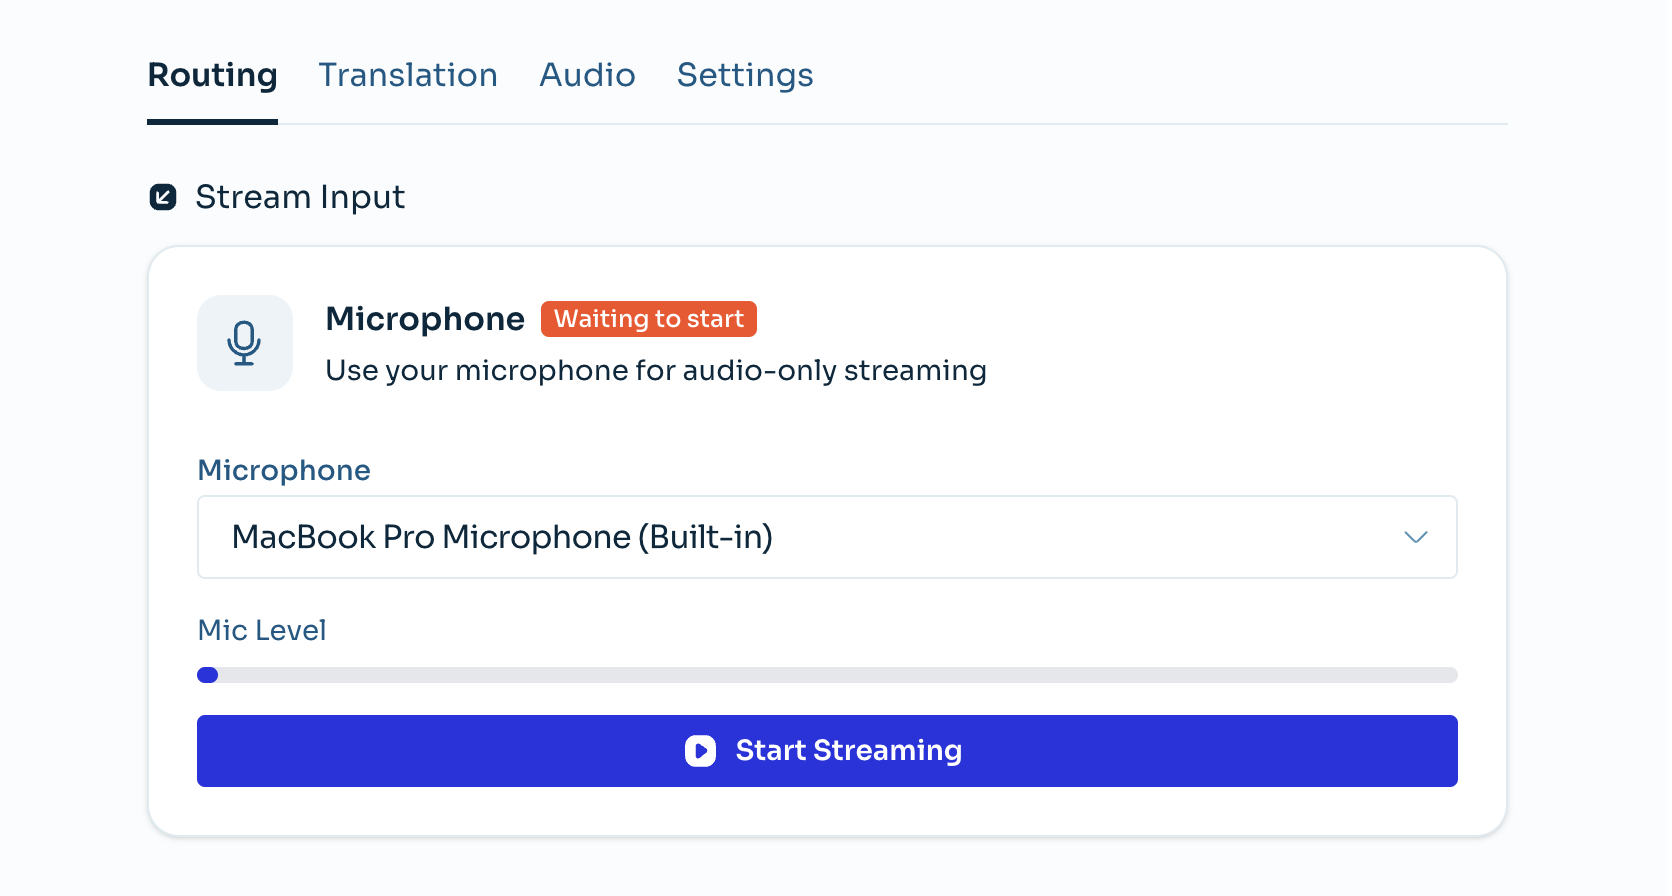
Channel Routing tab
Here you select the Channel's audio device (microphone), which is used as the speech source for translation in this Channel.
You can also start and stop streaming audio from the selected audio device here.
Channel Translation tab
Here you can adjust the source (Speaking) language and target (Translate to) languages, if needed.

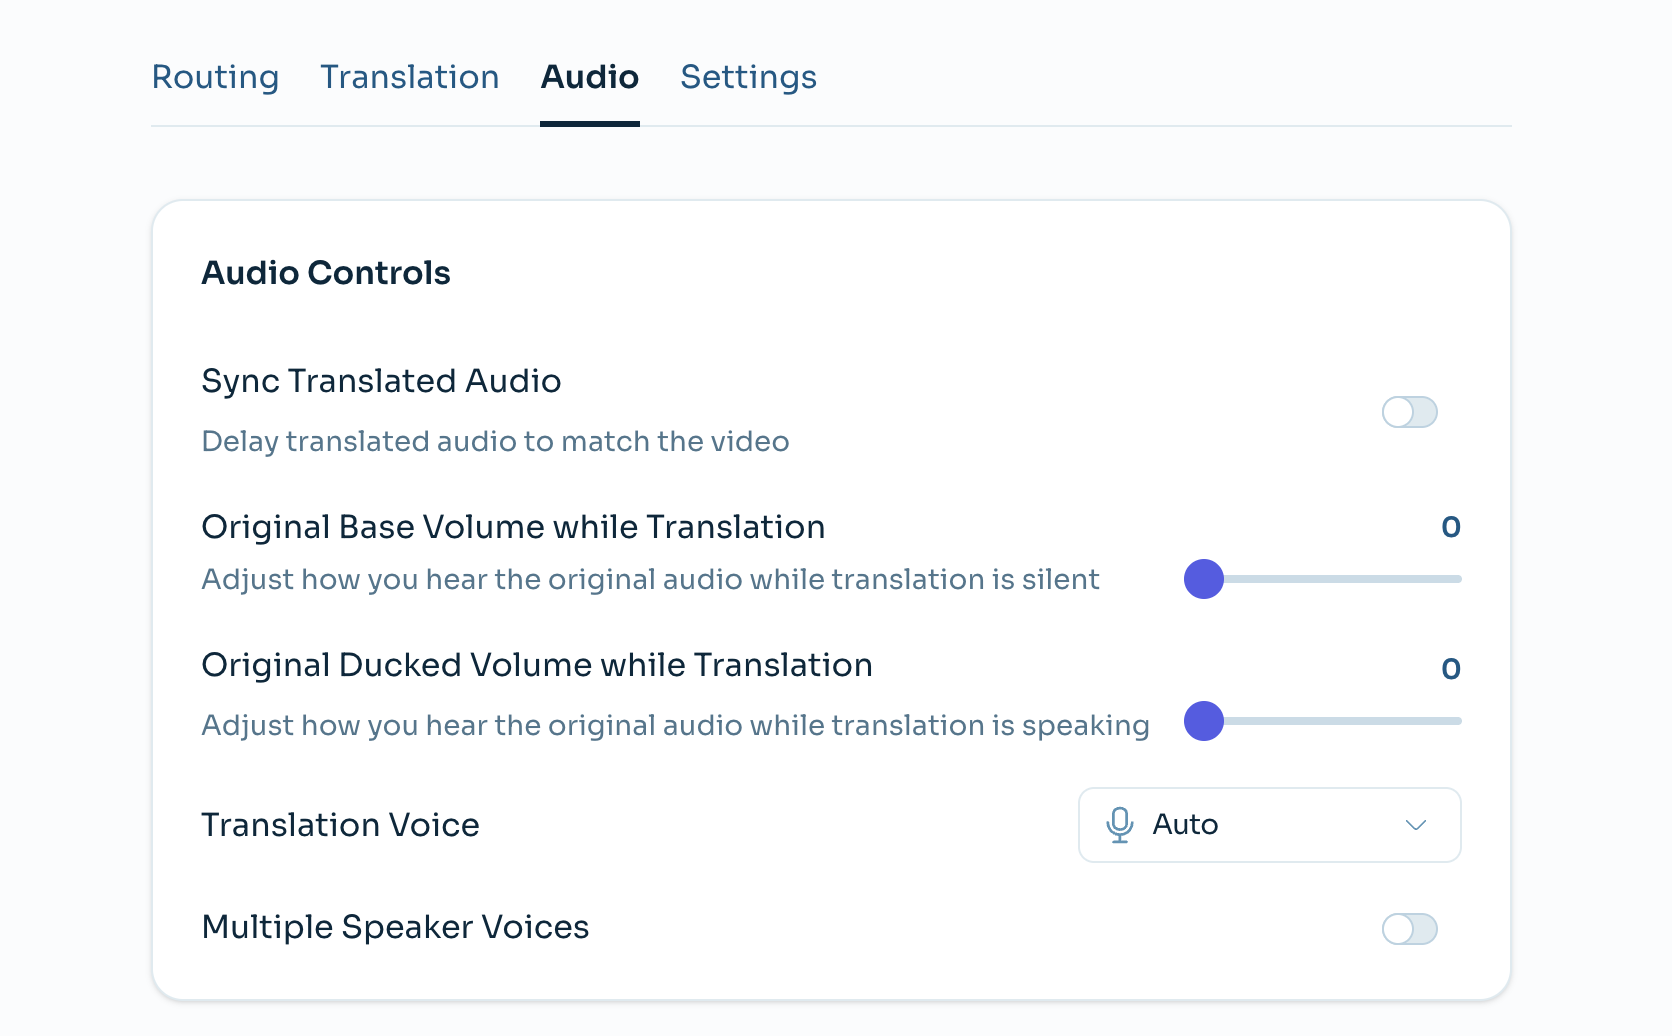
Channel Audio tab
Here you can configure audio settings for Listener Page users:
- Sync Translated Audio - adds delay (in seconds) to translated audio to match audio and video streams. Useful if your Event also streams video to the Listener Page (coming soon).
- Original Base Volume while Translation - adjusts how Listener Page users hear original audio while translation is silent. Set it above zero if you want translated-stream users to also hear some original audio.
- Original Ducked Volume while Translation - adjusts how Listener Page users hear original audio while translation is speaking. Keep it at zero or low if you want the original audio to be silent or ducked while translation speech is playing.
- Translation Voice and Multiple Speaker Voice - adjust the voices used for translated speech.
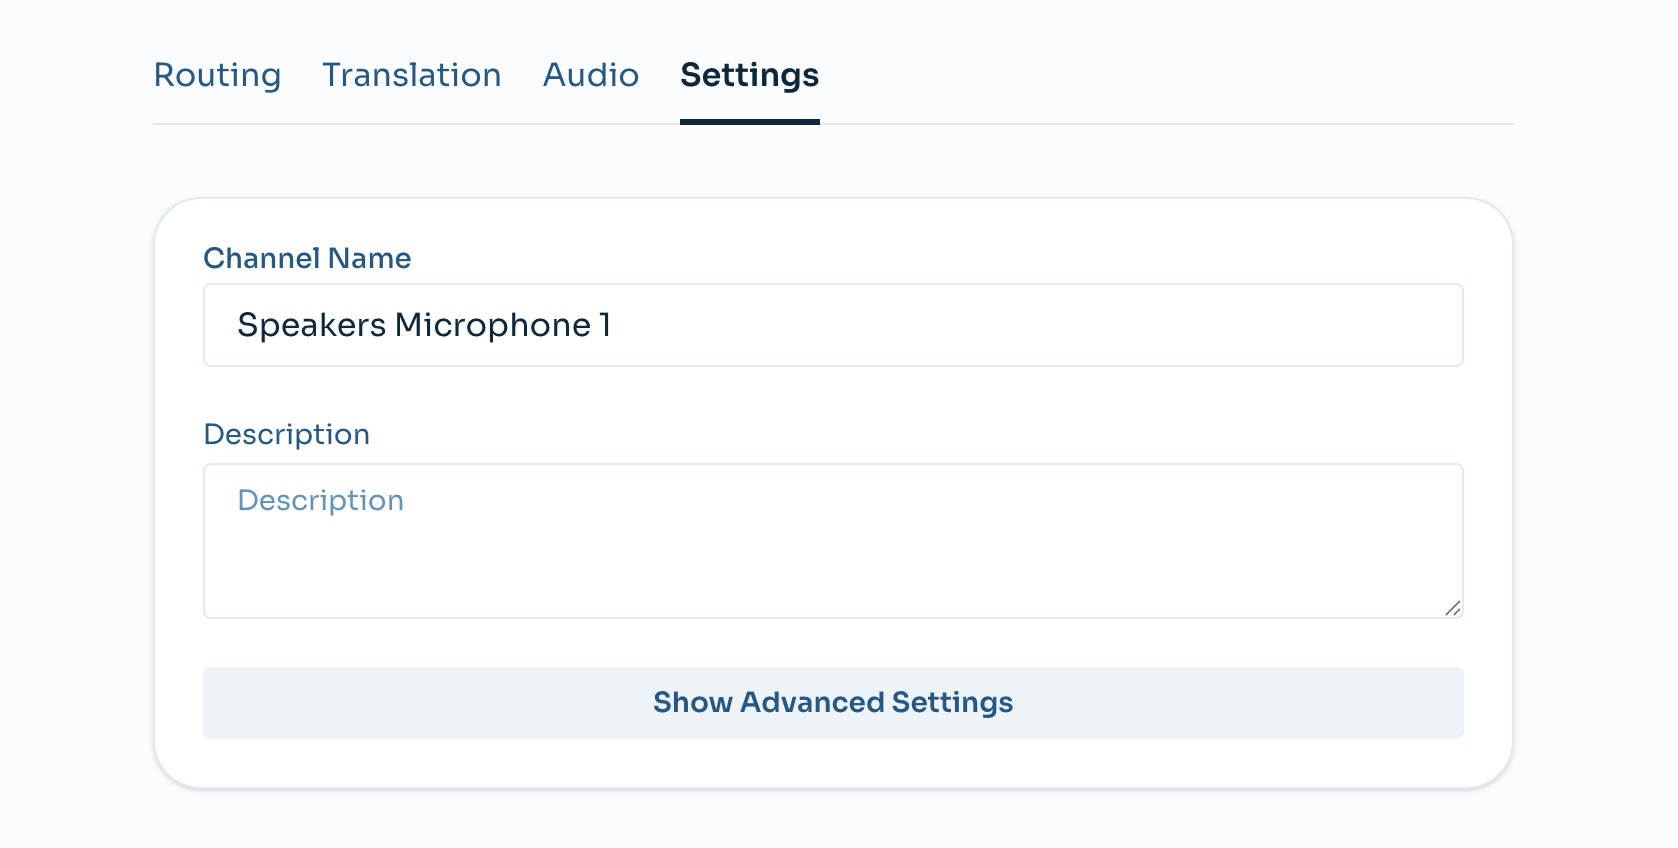
Channel Settings tab
This tab lets you change the title and description of the selected Channel.
Show Advanced Settings opens the raw JSON advanced configuration. Do not change any JSON settings unless you are an advanced Palabra API user or have been guided by the Palabra support team.
How to delete an Event
- Open the Events list.
- Open the event.
- Click Settings (gear icon) -> Delete Event.
- Confirm with Yes, Delete.
Deleting an Event also deletes all Channels in that Event.
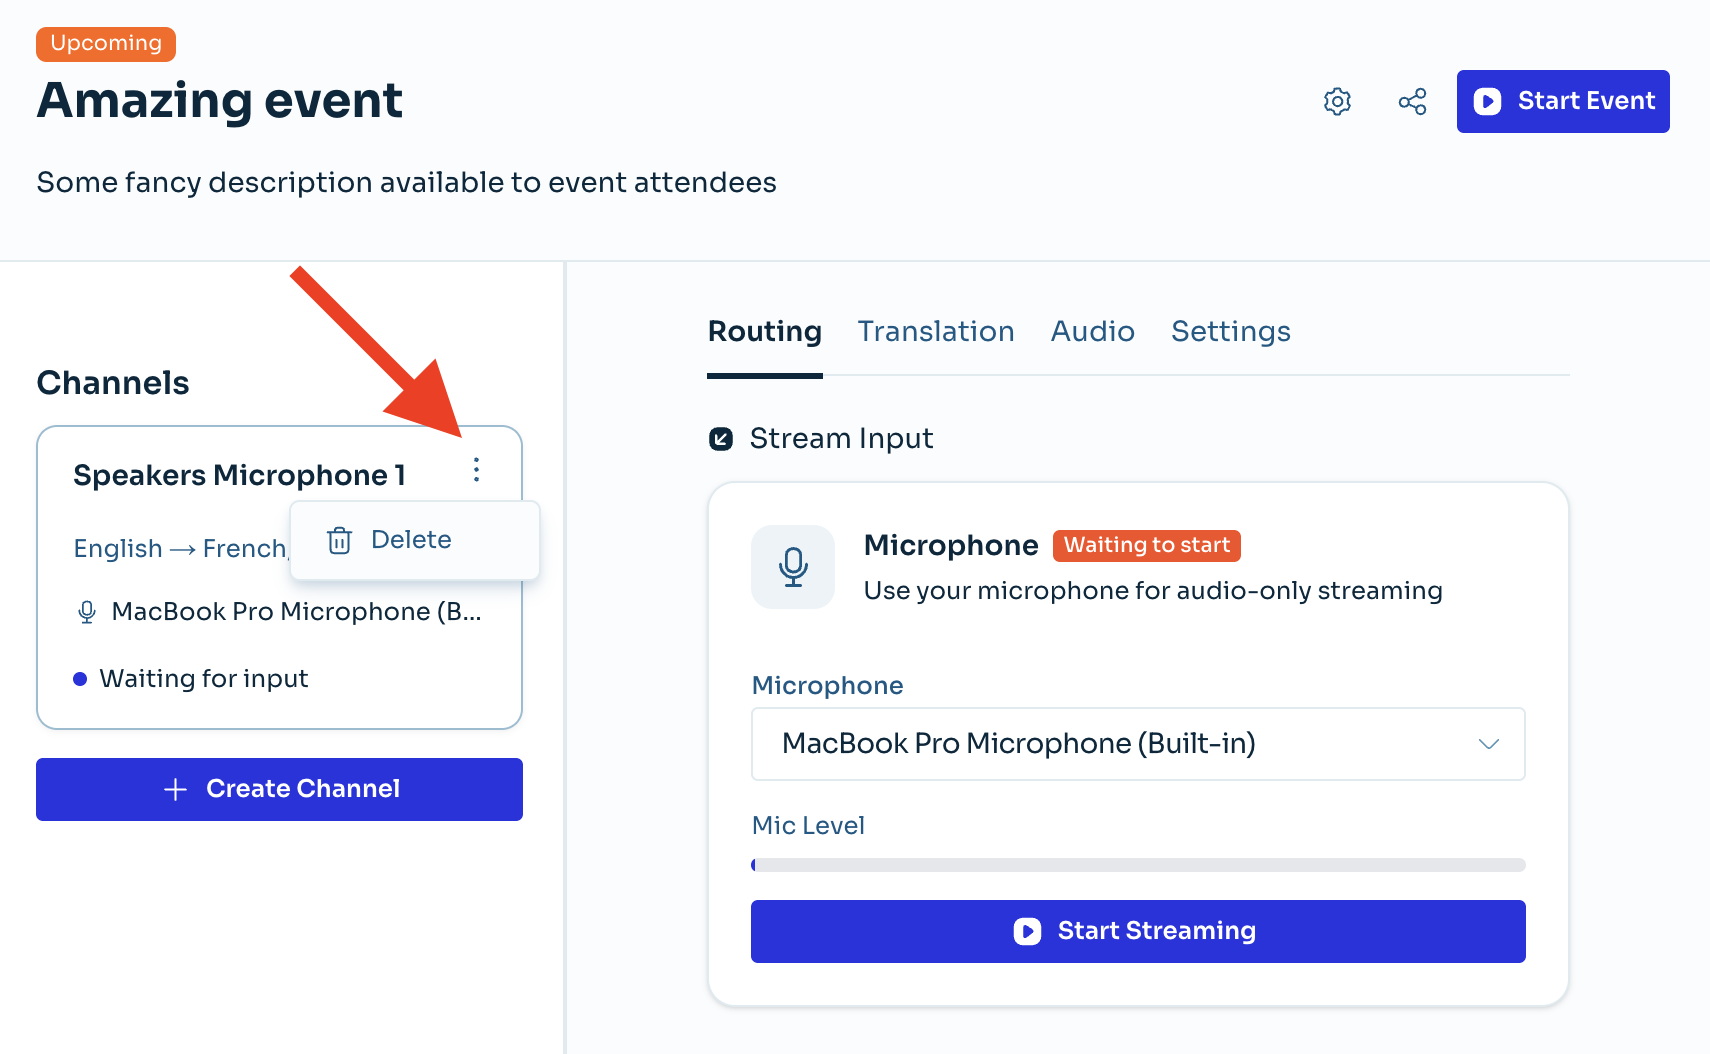
How to delete an Event Channel
- Open the Events list.
- Open the Event.
- In the Channel list, find the Channel card.
- Open the Channel's 3-dot menu.
- Click Delete.